
Introduction
In this article, I will show you how to create a simple login page. We use the Angular CLI to create projects and Materialize for UI.
The Angular CLI is a command-line interface tool that you use to initialize, develop, scaffold, and maintain Angular applications directly from a command shell. It saves you from the hassle of complex configurations and build tools like TypeScript, Webpack, and so on.
Materialize is a modern responsive front-end framework based on Material Design.
Prerequisites
You must have a basic knowledge of Javascript, HTML, and CSS. Knowledge of TypeScript is helpful, but not required.
Please check if you have installed Node and npm on your system by running simple commands to see the version of each.

Set up your environment
Install the angular CLI:

Create a workspace
The ng new <name> command is used to generate workspaces:

The ng new command prompts you for information about features to include in the initial app. Select the options you want, then press enter or return key.
Run the application
Navigate to your project directory

Run server

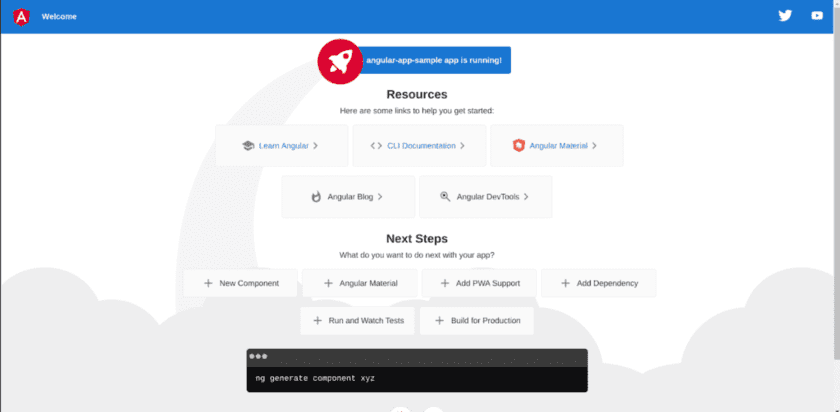
The ng serve command launches the server, watches your files, and rebuilds the app as you make changes to those files.
The –open option automatically opens your browser to http://localhost:4200/.
You should see a page similar to this:
Directory structure
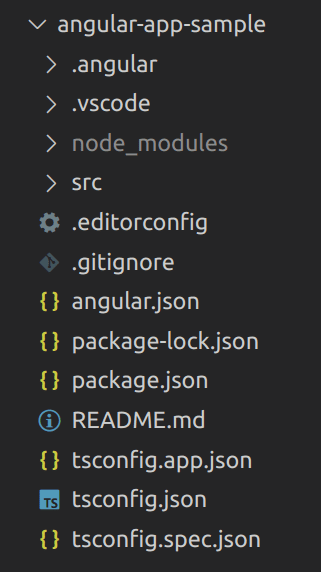
For full details about workspace configuration files see the post:
https://angular.io/guide/file-structure
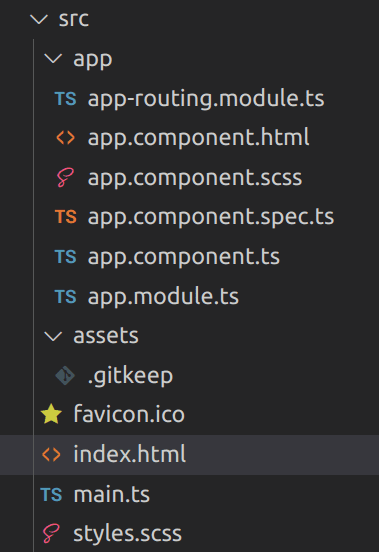
Inside the src folder, the app folder contains your project’s logic and data. Angular components, templates, and styles go here.
Install Angular Material
Add Angular Material to the project by running the following command:
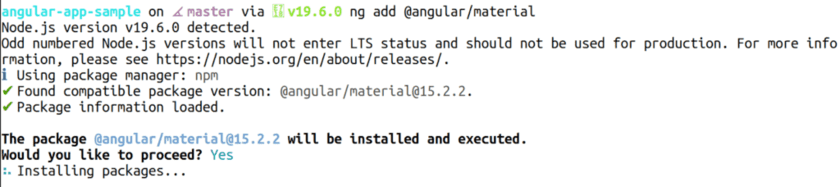
The ng add command will install Angular Material, the Component Dev Kit (CDK), and Angular Animations and ask you the following questions to determine which features to include:
- Choose a prebuilt theme name, or “custom” for a custom theme:
You can choose from prebuilt material design themes or set up an extensible custom theme. - Set up global Angular Material typography styles:
Whether to apply the global typography styles to your application. - Set up browser animations for Angular Material: Importing the BrowserAnimationsModule into your application enables Angular’s animation system. Declining this will disable most of Angular Material’s animations.
The ng add command will additionally perform the following actions:
- Add project dependencies to package.json
- Add the Roboto font to your index.html
- Add the Material Design icon font to your index.html
- Add a few global CSS styles to:
- Remove margins from body
- Set height: 100% on html and body
- Set Roboto as the default application font
You are done! Angular Material is now configured to be used in your application
Getting started
When getting acquainted with Angular, you must learn the concept of Component.
In the app folder, open the template file app.template.html. Add HTML structure, as follows:
<form class="login-form">
    <h1>LOGIN</h1>
    <mat-form-field>
        <mat-label>Username</mat-label>
        <input matInput>
    </mat-form-field>
    <mat-form-field>
        <mat-label>Password</mat-label>
        <input matInput type="password">
        <mat-icon matSuffix>
            visibility_off
        </mat-icon>
    </mat-form-field>
    <button mat-raised-button type="submit" color="primary">
        Login
    </button>
</form>
Your browser should display errors:
Compiled with problems:
ERROR
src/app/app.component.html:4:9- error NG8001: 'mat-form-field' is not a known element:
1. If 'mat-form-field' is an Angular component, then verify that it is part of this module.
2. If 'mat-form-field' is a Web Component then add 'CUSTOM ELEMENTS_SCHEMA' to the '@NgModule.schemas' of this component to suppress this message.
<mat-form-field>
src/app/app.component.ts:5:16
5 templateUrl: './app.component.html',
Error occurs in the template of component AppComponent.
ERROR
src/app/app.component.html:5:13 error NG8001: 'mat-label' is not a known element:
1. If 'mat-label' is an Angular component, then verify that it is part of this module.
2. If 'mat-label' is a Web Component then add 'CUSTOM_ELEMENTS_SCHEMA' to the '@NgModule.schemas' of this component to suppress this message.
5
<mat-label>Username</mat-label>
src/app/app.component.ts:5:16
5 templateUrl: './app.component.html',
Error occurs in the template of component AppComponent.
Don’t worry, the cause of the error is that you’re trying to use the Components of Angular Material UI in AppComponent but you are not importing them in the app/app.module.ts. To import Material modules, create your module i.e. app/shared/material.module.ts, and do something like the following:
import { NgModule } from '@angular/core';
import { MatIconModule } from '@angular/material/icon';
import { MatInputModule } from '@angular/material/input';
import { MatButtonModule } from '@angular/material/button';
@NgModule({
    exports: [
        MatIconModule,
        MatInputModule,
        MatButtonModule
    ]
})
export class MaterialModule {}
Then import the module into your app/app.module.ts
import { NgModule } from '@angular/core';
import { BrowserModule } from '@angular/platform-browser';
import { AppRoutingModule } from './app-routing.module';
import { AppComponent } from './app.component';
import { BrowserAnimationsModule } from '@angular/platform-browser/animations';
import { MaterialModule } from './shared/material.module';
@NgModule({
    declarations: [
        AppComponent
    ],
    imports: [
        BrowserModule,
        AppRoutingModule,
        BrowserAnimationsModule,
        MaterialModule
    ],
    providers: [],
    bootstrap: [AppComponent]
})
export class AppModule {}
In app/app.component.scss adds some CSS properties to make the page look more pleasant
.login-form {
    display: flex;
    flex-direction: column;
    margin: 50px auto;
    text-align: center;
    max-width: 450px;
}
In Angular, a component’s styles can be encapsulated within the component’s host element so that they don’t affect the rest of the application.
Back to the browser and check the result:
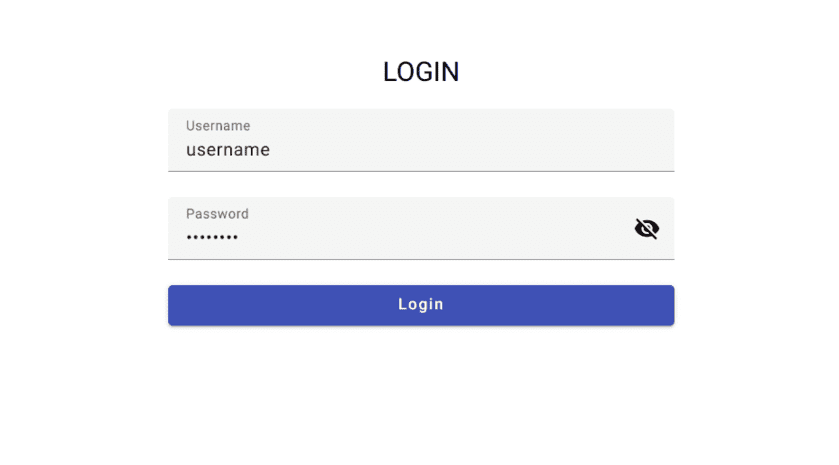
In this article, I showed you how to create a new project using Angular CLI, and how to add Angular Material. In the next article I will talk about service, guards, and show you how to connect to an API.
Would you like to read more articles by Tekos’s Team? Everything’s here.